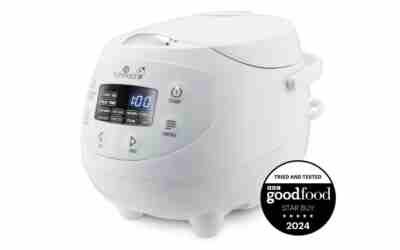

To use a rice cooker, rinse the rice if needed, add water to the matching inner-pot line, press cook, then rest 10 minutes before fluffing.
Step-by-step: how to use a rice cooker from rinse to serve
These steps fit basic and micom (computerized) cookers alike. Button names differ by model, so match them to your manual.
- Measure the dry rice. Level it off in the cup that came with the cooker, not a regular kitchen cup.
- Rinse if needed and drain. Swirl the rice in a separate bowl, not in the cooker pot, and drain well. The next sections cover which rice needs it.
- Add the rice to the inner pot. Spread it into a flat, even layer so it cooks at the same rate.
- Add cold water to the line. Fill to the line that matches your rice type and cup count. Never go past the max fill line, or the pot can boil over.
- Dry and seat the pot. Wipe the outside of the pot dry, set it in the base, turn it slightly until it sits flat, close the lid and plug in.
- Pick the setting and press cook. Choose white, brown, sushi or another program if your model has them. Cook time depends on the model and setting, and our chart of how long a rice cooker takes lists typical times by rice type.
- Rest, then fluff. When the cooker clicks over to keep-warm, leave the lid closed for 10 minutes. Open the lid away from your face, because the steam burns, then fluff with a plastic or wooden paddle.
Rice cooker cup vs US cup: why the difference matters
The cup in the box is a Japanese-style rice cup holding about 180 mL, or roughly ¾ of a US cup. The numbered lines inside the pot are marked for that cup size.
Worked example: 3 rice cooker cups of rice equals 540 mL, or about 2¼ US cups. If you scoop 3 US cups (about 710 mL) into the pot instead, you have nearly 4 cooker cups of rice, so the line 3 water is far too little and the rice comes out hard and uneven.
If you lost the cup, a ¾ US cup measure is close enough (about 177 mL). Do not mix the two cups in one batch.
Water ratio by rice type
Use the inner-pot lines first. They are calibrated to your cooker, and the line for your rice type beats any ratio from a recipe. If your pot prints separate lines for white and brown rice, use the one that matches. The table gives starting points for a pot with no lines or a rice type it does not mark.
| Rice type | Water per 1 cup rice (same cup for both) | Setting |
|---|---|---|
| White long-grain | 1¼ cups | White or regular |
| Jasmine | 1 cup | White or regular |
| Sushi (short-grain) | 1 cup | Sushi if available, otherwise white |
| Brown | 1½ to 1¾ cups | Brown (needs the longer cycle) |
Every figure here is a starting point, not a fixed rule. Published ratios disagree because rinsing leaves rice damp, newer rice holds more moisture than old rice, and each cooker seals and vents differently.
Worked example: 2 cooker cups of white long-grain is 360 mL of dry rice, about 1½ US cups. Fill the pot to the line 2 mark and do not measure the water at all. As a cross-check, the 1¼ starting ratio works out to 2½ cooker cups of water, or 450 mL, so the line should land in that neighborhood. If your line sits well above or below it, trust the line.
Treat the first batch as a test and adjust with the fixes near the end of this guide. For a full cup-by-cup breakdown, use our rice cooker water ratio chart.
Should you rinse rice before cooking it?
It depends on the rice. Rinsing removes surface starch, which gives separate, less gummy grains. Zojirushi suggests filling the pot with cold water, draining right away, and repeating 2 to 3 times.
The other side: USA Rice says American-grown rice does not need rinsing, and that washing enriched rice can rinse away added vitamins and minerals.
Decision rule: rinse sushi, jasmine, imported rice and any rice that turns the water cloudy. For enriched US long-grain white, skipping is fine unless the bag says to rinse. If the bag says not to, follow the bag.
After rinsing, tilt the strainer or bowl and drain for a minute. Leftover water in the rice makes the batch slightly wetter than the line expects, which is why draining matters more than rinsing itself.
Why you should rest rice, and how long it can stay on keep-warm
Resting with the lid closed lets steam spread through the pot. The wet bottom layer firms up and the top stops being sticky. Skip it and you get gummy rice on the bottom and drier rice on top.
Keep-warm is for serving, not storage. Cooked rice can carry Bacillus cereus spores that survive cooking, and they multiply when rice sits at room temperature. USDA says hot food stays safe at 140°F or above, so plan to serve within a few hours of the click and never past the maximum keep-warm time in your manual. Rice left on keep-warm also dries, yellows and picks up an odor over time.
Once you unplug the cooker or the rice cools, USDA says to refrigerate it within 2 hours. Spread leftovers in a shallow container so they chill fast, then reheat them until steaming hot. USDA’s reheating target is 165°F.
Cleaning the inner pot
Unplug the cooker, let the pot cool, then wash it by hand with a soft sponge and dish soap. Steel wool and metal utensils scratch the nonstick coating, so use the plastic paddle that came with the cooker, and put the pot in the dishwasher only if the manual allows it.
Fixing mushy, hard or foamy rice
Adjust one thing at a time so you can tell what worked.
- Mushy or wet rice: too much water, or the rice went in still dripping. Drain longer, and next batch use 1 to 2 tablespoons less water per cup of rice.
- Hard or crunchy centers: too little water, or the wrong cup was used. Add 1 to 2 tablespoons per cup of rice next time, and double-check the cup size.
- Foam spilling from the vent: the rice carried too much surface starch. Rinse it more and cook a slightly smaller batch.
Our Top Picks
Ready to shop? These are the top-rated options from our hands-on roundup, Best Rice Cooker Under $100 of 2026.
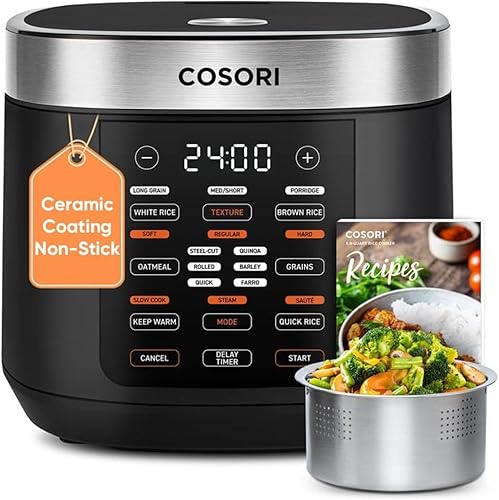
Cosori 10-Cup Rice Cooker with Fuzzy Logic

Zojirushi 6-Cup Rice Cooker NHS-10

Toshiba TRCS02 Mini Rice Cooker, 3-Cup Fuzzy Logic
As an Amazon Associate we earn from qualifying purchases. Product prices and availability are accurate as of the date/time indicated.
Frequently Asked Questions
Can I cook quinoa or oatmeal in a rice cooker?
Quinoa works well: rinse it, start with 1 cup quinoa to 2 cups water, and run the white rice setting. Oatmeal only works if your manual lists a porridge or oatmeal program, because plain rice cycles can foam and boil over.
Can I use broth instead of water?
Yes. Fill to the same line with broth. Skip milk, cream and sugary liquids unless your manual allows them, since they scorch on the bottom and can foam over.
Is cooking just 1 cup of rice too little?
Cook at least the lowest line printed in your pot, usually 1 cooker cup. Below that, the thin layer dries out or scorches before the sensor reads the cycle correctly.
Can I add salt, butter or oil to the rice?
Yes, in small amounts. A pinch of salt or a teaspoon of butter or oil per batch is typical. Stir it into the water before you press cook, then level the rice again.
Can I cook frozen rice in the cooker?
Not as a reheating step. The cooker is built to cook raw rice, so thaw frozen cooked rice in the refrigerator and reheat it in the microwave or a pan instead.
{“@context”: “https://schema.org”, “@type”: “FAQPage”, “mainEntity”: [{“@type”: “Question”, “name”: “Can I cook quinoa or oatmeal in a rice cooker?”, “acceptedAnswer”: {“@type”: “Answer”, “text”: “Quinoa works well: rinse it, start with 1 cup quinoa to 2 cups water, and run the white rice setting. Oatmeal only works if your manual lists a porridge or oatmeal program, because plain rice cycles can foam and boil over.”}}, {“@type”: “Question”, “name”: “Can I use broth instead of water?”, “acceptedAnswer”: {“@type”: “Answer”, “text”: “Yes. Fill to the same line with broth. Skip milk, cream and sugary liquids unless your manual allows them, since they scorch on the bottom and can foam over.”}}, {“@type”: “Question”, “name”: “Is cooking just 1 cup of rice too little?”, “acceptedAnswer”: {“@type”: “Answer”, “text”: “Cook at least the lowest line printed in your pot, usually 1 cooker cup. Below that, the thin layer dries out or scorches before the sensor reads the cycle correctly.”}}, {“@type”: “Question”, “name”: “Can I add salt, butter or oil to the rice?”, “acceptedAnswer”: {“@type”: “Answer”, “text”: “Yes, in small amounts. A pinch of salt or a teaspoon of butter or oil per batch is typical. Stir it into the water before you press cook, then level the rice again.”}}, {“@type”: “Question”, “name”: “Can I cook frozen rice in the cooker?”, “acceptedAnswer”: {“@type”: “Answer”, “text”: “Not as a reheating step. The cooker is built to cook raw rice, so thaw frozen cooked rice in the refrigerator and reheat it in the microwave or a pan instead.”}}]}